
Building New Problems in the Problem Editor
Learn more about creating new problems in our builder by reading the directions below or by watching the video below.
Getting Started
To build new problems, click ‘My Problem Sets’ within the navigation bar on the left side of your screen, then click the ‘+ New’ button and choose Problem Set.
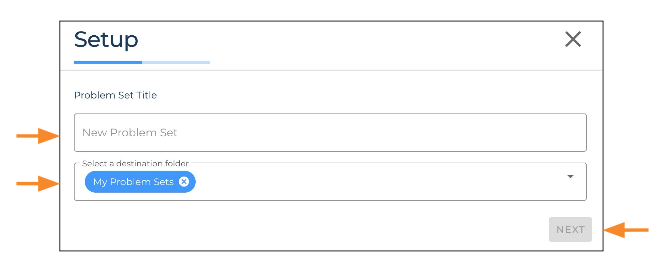
When the Setup pop-up appears, enter a Problem Set Title, or name, in the box provided and choose a destination folder for the problem set (if applicable). Then, click ‘Next’.
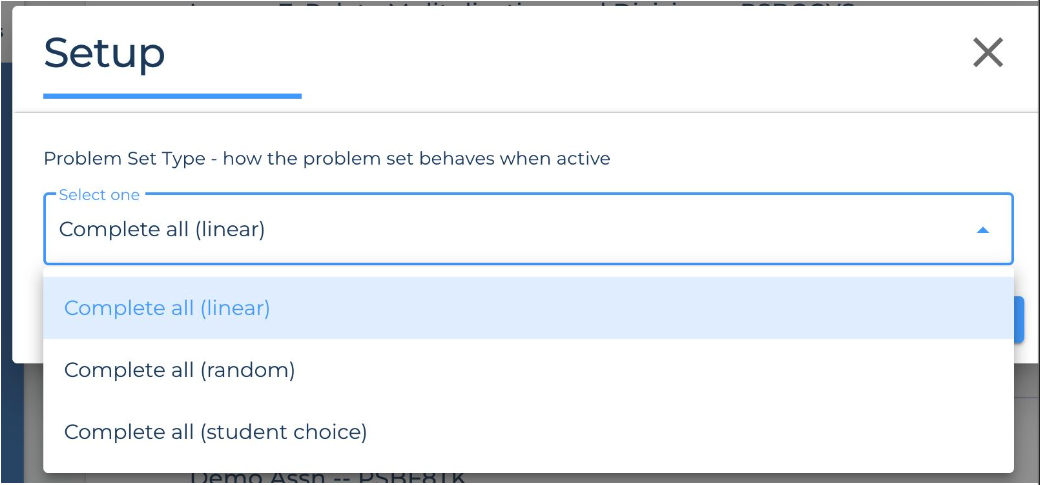
Next, choose the Problem Set Type based on how you want the problems in the set to be ordered when students complete them in an assignment. Then, click ‘Next’. To learn more about Problem Set Types and other Assign-Time Options, click here.
Creating a New Problem
Clicking ‘Next’ will take you to the Problem Set View page, click the ‘+ New’ button and select either ‘Problem’ for a single part Problem or ‘Multi-Part Problem’ to create a multi-part problem to start building your problem(s).

Features in the Problem Editor

- The triple-dot menu at the top includes options to Remove or Copy a Problem, Replace a Problem with a Copy, Edit Standards the problem is tagged with or view the Problem Info.
- Use the Problem Type dropdown within the Problem Setup card to choose the type of problem you want to build. See Problem Types section below for more information on the different types of problems you can create.
- If you’re working on a drag-and-drop or fill-in problem, you can add an answer box or dropdown menu to the problem body by clicking the forward slash on your keyboard or clicking the Add Response Item icon in the Problem Setup box.
- Enter the body of the problem in the field provided.
- For fill-in/text problems only: Once you’ve created the problem body, use the answer setup card to choose the Answer Type and indicate what the correct answer is to the problem. **See below this list for a detailed overview of Answer Types.
- The Support card allows you to create Hints, Explanations, and Response Feedback. Click here to learn more about Student Supports.
Problem Types
- Multiple Choice (Single Select) - Student is required to select a single answer from a list (Auto-scored)
- Multiple Choice (Multi-Select) - Student is required to to select all the answers that apply from a list (Auto-scored)
- Drag & Drop - Student is required to drag options from a bank into one or more drop locations (Auto-scored)
- Fill-In (Text or DropDown) - a problem that has one or more answer boxes within the problem body. The answer boxes can be a fill-in or provide a dropdown menu (Auto-Scored). Below is an overview of different answer types that teachers can choose from:
- Exact Match - Builder sets an answer. Students are marked correct if they answer an EXACT MATCH to the set answer.
- Algebraic Expression -
Builder sets an algebraic expression. Students are marked correct if they enter any algebraic expression equivalent to the set answer. - Exact Fraction - Builder sets a fraction as the answer. Students are marked correct if they answer an EXACT MATCH to the fraction given. Equivalent fractions will not be accepted.
- Numeric - Builder sets a rational number. Students are marked correct if they enter any rational number equivalent to the set answer
- Numeric Expression - Builder sets a numeric expression. Students are marked correct if they enter any numeric expression to the set answer, regardless of operators.
- Ordering - Student is required to order (drag) a selection of options in a specific order (Auto-scored)
- Ungraded Open Response - Student is required to submit open ended work which the teacher will need to review and score (not auto-scored)
Publishing the Problem
When all components of a problem or problem set are built, they can be published. Publishing ensures that there are no errors in the problems (such as missing answers).
Click the Publish All button to publish your problem set. You will be prompted once more on whether you want to publish via a pop-up. (see below)

When you attempt to publish and there’s an error in one or more of your problems, a red dot will appear next to the Problem Set ID. Below the Problem Set ID will be a bulleted list of the errors that need to be fixed.

Once your problem set is published, you can click the yellow assign button at the bottom of the page. Click here to learn more about assigning problems.
.svg)